Showing posts with label crochet. Show all posts

Saturday, January 18, 2014

Super Secret Crochet Project Revealed!

I have been working, off and on, for several months on a large crochet project. You may have spotted some of the early attempts in the background of some of my advent calendar posts...but now it is finally finished! Ladies and gentlemen...Tom Servo!

"Actually, it's Serveaux."
He stands at nearly two feet tall, so we're talking life-sized here. He is made entirely from yarn and stuffing--a whole 12-ounce bag of stuffing, actually. There was no sign of a pattern anywhere online, so this is a combination of measurements I found on various bot-building websites, lots of pictures, and eyeballing it. I also have this four-inch Servo that came with one of the DVD sets, so I used him as a reference as well.


I started with the head and worked my way down. The head, neck, body, and "hoverskirt" are all one continuous piece, crocheted from top to bottom. The mouth is sewn on separately, and is actually three small pieces sewn together (top, bottom, and inside). The arms are one piece each.

I had some trouble with the detailing on his chest, which was originally the engine block from a toy car. I wanted it to be as simple as possible, without losing too much detail. The version I finally came up with has four separate pieces that are sewn together and then sewn onto the chest.


The tube around the bottom is just one long piece, and the other details on his skirt are also sewn on separately. They were originally pieces of plastic vacu-formed over the engine from a toy train set. There are six of them. I found the best way to space them out was to sew the front one on first. Then I placed the back one directly behind it. Then I placed two in between on one side, and repeated on the other side.

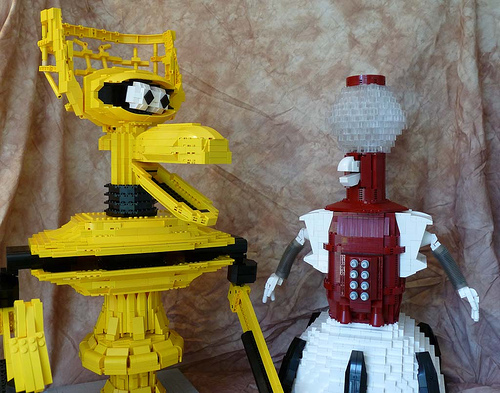
I also found some other great re-creations of Tom. Here he is, along with Crow T. Robot, in Lego form:

Via Reasonably Clever!
And this great plushie is made from felt and stuffing:

Via
Anyway, this was great fun to make! I took notes on all of the parts, which I am going to type up and have available as a pattern. Hopefully this will be within the next week or two.

Friday, November 15, 2013

Movie Review, Pac-Man Crochet, and Doctor Who Excitement

Today's post comes to you in three parts. Part one: Ender's Game review.

Jason and I went to see Ender's Game on Sunday. We had both read the book in the past, though Jason admitted he only remembered the basic plot. I remembered more of the details.

For those of you unfamiliar with the story, Andrew "Ender" Wiggin is a teenage boy who is part of a military program to fight a war against the Formics, ant-like aliens who invaded Earth half a century ago. The Formics nearly wiped out the human race before a sound defeat that sent them back to their home planet. Ender is sent to the elite outer space Battle School to become a great military leader.

As a book-to-film translation, it works very well. The biggest change they made was to condense the story time-wise. Ender is older when he leaves for Battle School, and the entire course of events takes place over no more than a year or two. In the book, Ender is seven or eight when they ship him into space and the book takes place over four or five years. There are many reasons for making Ender older, and overall I think it makes the movie better.

I do think they could have either made the movie longer (it clocks in at just under two hours) or even broken it into two parts. The subplot between Ender's brother and sister, Peter and Valentine, is cut out entirely even though it is a significant part of the book. The other big omission, and my biggest disappointment with the film, was the most of the zero-G battles were cut out. We get to see a few scenes, and they look fantastic. I definitely would have wanted to see more, especially since they take up a good portion of the book as well.

Overall, I would give Ender's Game 4/5 stars.

Part two: My latest crochet project!


I found both of the patterns on Ravelry. The ghosts were originally a Halloween decoration in white. In addition to the color change, I eliminated the original bead eyes and the finishing mouth stitches. I attached the googly eyes with my trusty hot glue gun. Pac-Man was originally all in yellow, but I thought he would look better with a black mouth. This was a quick, easy project. The ghosts take about half an hour, and Pac-Man was probably an hour start to finish. You can find the (free!) ghost pattern here. If you're on Ravelry, you can find the (free!) Pac-Man pattern here.

Part three: OMG THE DOCTOR WHO 50TH ANNIVERSARY IS A WEEK AWAY!!!1!

The Day of the Doctor is coming, people. Next Saturday. And I am so. Flippin. Excited.

Can you tell?

Jason and I have plans to see it with the Chicago Nerd Social Club. They're having a meet-up for lunch and viewing. This is great, because we don't have cable. We don't even have an antenna--our big-screen TV is used exclusively for DVDs, video games, and Netflix. Of course, it makes no sense to get a cable subscription just for one show.

So since we're going to be out and about, in the lovely Chicago winter, I decided that I needed to knit myself a TARDIS hat. I started on it last night and I will post pics when it's all done!

Wednesday, February 13, 2013

Hat #7 (Hat-a-week): Epbot!

Here is my latest hat creation! Fellow readers of EPBOT will recognize this little guy instantly. Everyone else will think it's just a robot hat, but still pretty adorable.


Epbot is one of my favorite blogs. I started reading her other, more famous blog, Cake Wrecks, after I found the CW book and could not stop laughing. I think my favorite was the cake which said, in beautiful script, "Go Die In a Car Fire." Anyway, Jen has the most amazing projects on her blog. One of my goals in life is to make a penny desk...though that will undoubtedly need to wait until Jason and I have a house, rather than an apartment with carpeting that could get covered in bartop epoxy. Jen is one of my favorite friends-I've-never-met. I think that should be a thing now: someone you feel like you know, through blogs or YouTube videos or podcasts, but you've never met in person.

But I digress. Back to the hat! I find that designing a piece from scratch (rather than adding a picture to an otherwise plain hat) is easier with crochet than knitting. This is probably because it's easier to see my work as I go along--with knitting, all of the stitches are connected to the needle until it's all done.

Unlike knitting, which starts at the bottom, crocheted hats usually start at the top. I started with the plain silver yarn to make the basic hat. The embroidery was next: teal for the eyes (the same fuzzy stuff I used for the brim of my last hat) in satin stitch, and backstitch in black to make the seams. 

The little earpiece-thingies (I think?) on either side were made separately and sewn on. The little knobbly parts I worked with a smaller size crochet hook. Then I picked up 4 stitches with a knitting needle and worked a couple inches of I-cord. The antenna/orange light on top is made from pipe cleaners. I twisted the orange one around a yarn needle to get the right shape. I used the very end to make a little loop and put the end of the black pipe cleaner into it. Then I pulled the orange end down through the middle. It seems to be pretty secure. I stuck the other end of the black through the top of the hat and used the yarn ends to stitch it in place.

I had to work the ear flaps in black because I ran out of the silver, which was left over from the Dalek plush I knitted a couple years ago for my hubby. It's called Vanna's Glamour, and I used two strands held together throughout the whole project. The black is worsted-weight yarn.

If people want a more complete pattern I will try and post one later!

The ears tend to flop when I put the hat on. I may try to put some pipe cleaners in there as well, for stability. On the other hand, they do look kinda cute all floppy.


My next hat is going to be another hat with ear flaps, and another hat that sci-fi geeks will probably recognize instantly. Stay tuned!

Well, what do you think, sirs?

It stinks!

Sunday, January 6, 2013

Hat-A-Week, day 6

My second hat is complete!


It turns out the bottom wasn't that much wider than the top after all, and it still works as a ski cap. I'm pleased with how it came out.


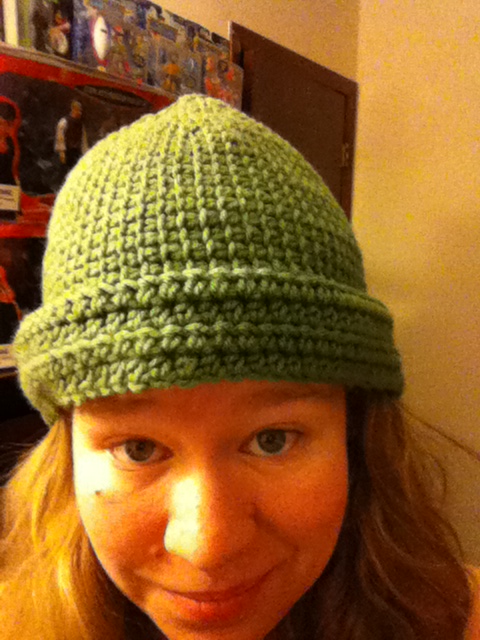
And here it is on my head!

In case you want to try making it yourself, here is the pattern.

You will need:
Worsted-weight yarn (1 skein)
Afghan crochet hook, size H
Regular crochet hook, size H (optional--the afghan crochet hook can also be used like a regular hook, although it is a little awkward)

With regular hook, chain 86. Yarn over and insert hook into 3rd chain from hook. Work the first row of half-double crochet (84 hdc). Chain 2, turn.

Work 3 more rows of hdc (about 2 inches). Switch to afghan hook.

To work the afghan stitch: *insert your hook into the first hdc and pull up a loop. Repeat across (84 loops). Yarn over and pull through the first loop. This is similar to a turning chain. Yarn over again and pull through next 2 loops. Repeat, pulling through 2 loops at a time, until there is only 1 loop left.* This counts as 1 row. Do not turn your work; afghan stitch is always worked on the right side of the fabric.

Next row: insert your hook into the second vertical bar from the end (circled in the photo below). Yarn over and pull up a loop. Repeat across (84 loops). Decrease the same way as above.

Just to clarify, if you are trying this at home and you think it looks backwards: lefties like me work the afghan stitch from left to right. Right-handers work it from right to left.

Work afghan stitch until hat is the length you want (mine has about 3 in of afghan stitch, but it could be longer).

Decrease: Always decrease on the row when you are picking up loops, and then work back to the beginning of the row.

Decrease row 1: *Pick up 5 stitches, insert hook through next 2 loops and pull up 1 stitch (decrease made), repeat from * across.

Decrease row 2 and all even-numbered rows: work across all stitches.

Decrease row 3: *Pick up 4 stitches, decrease, repeat from * across.

Decrease row 5: *Pick up 3 stitches, decrease, repeat from * across.

Decrease row 7: *Pick up 2 stitches, decrease, repeat from * across.

Decrease row 9: *Pick up 1 stitch, decrease, repeat from * across.

Decrease row 11: Decrease all stitches across.

Next row: slip stitch in all remaining stitches and finish off, leaving a long tail for sewing in. Weave the yarn needle through all stitches and pull tight to create the crown of the hat. Sew down the back. The seam on this hat will be pretty visible, so make sure you wear it with the seam in the back.

My next hat is going to be one that my brother requested as a birthday gift...so Johnny, if you don't want spoilers, stop reading the blog for a while. Of course, I'm not going to reveal what else you're getting for your birthday.

Saturday, January 5, 2013

Hat-a-Week, day 5

I am currently working on hat number two!

The yarn: Loops & Threads Impeccable (worsted weight, acrylic) in a sort of bottle green color.

The pattern: I am making it up as I go along! This is called an afghan crochet hook:

It looks like a combination between a regular crochet hook and a knitting needle, and the technique you use is sort of a combination of knitting and crochet. Regular crochet works by making several loops on your hook and working them until only one loop is left. This makes one stitch. With afghan crochet, you pick up a loop from every stitch in the previous row, and then work one stitch at a time (similar to knitting, except instead of transferring it to another needle, you pick up the same stitch on the next row). 

Here's an in-progress shot of the hat:

See how it's curling up at the end? Apparently that's a common problem with the afghan stitch. I didn't want the bottom of my hat to curl up after the hat was finished, so I added a few rows of regular crochet at the bottom, which lies flat.


See the difference? Also, you can tell from this shot that the stitches start to curl as soon as they come off the hook. Without the border the hat would probably curl up halfway to my forehead. Unfortunately, the half-double stitches are a lot wider than the afghan stitches, so this is probably going to be more like a bucket hat when it's all done. We shall see!


Here is a close-up of the afghan stitch. I like it because it kind of looks like a combination of crochet and weaving.

Saturday, May 21, 2011

Crochet Project: Custom Care Bears

When I think of '80s pop culture, I immediately think of the Care Bears. I am too young to remember when they were actually popular, but when I was a little kid I thought they were the coolest thing ever. I have almost all of them, because my parents would pick them up at secondhand stores for my collection. To this day, I will buy almost anything with the vintage Care Bears (I do not care too much for their anime-inspired re-design). So when I saw this book at the fabric store a few years ago, you can bet I snatched it up.


Unfortunately, the book is now out of print, but a little searching should turn up some used copies.

Anyway, the book gives instructions for your basic Care Bear, followed by instructions to crochet the various "tummy symbols" for each bear. My first project from the book was Funshine Bear, one of the few I did not have in my collection already.


But as I was working on it, I realized the potential for customization here. My first thought was to do Cheer Bear (pink, with a rainbow) as Pink Floyd Bear (hot pink, with the prism from Dark Side of the Moon). This really got the creative juices flowing. With the right color/symbol combination, you could create a Care Bear reflecting almost any interest or hobby. I decided to test this by making my brother a Nintendo Bear for his birthday.

Here he is! Click on the pics for a full-sized view.


I used Vanna's Choice in (Nintendo-logo) red and white, with a Mario mushroom as the tummy symbol. I made the mushroom out of felt, rather than try and figure out how to crochet the exact shape. The eyes are also from felt on both bears, and the heart nose and foot pads are crocheted from embroidery floss. The instructions for the face and foot pads are included in the book. Funshine Bear's mouth is crocheted, but Nintendo Bear's is backstitched with the same yarn I used for the body.

Here is a close-up of the mushroom.

I found a picture online, printed it out in the exact size I wanted, and used that as my pattern and template. Then I used hot glue to attach everything together. There are several layers in some places. I glued the white spots onto the red cap, and then glued the red cap and white stem onto black and cut it out with about a quarter-inch border. The little "eyes" on the mushroom are backstitched right onto the felt, done before gluing onto the black. The whole thing was glued right onto the tummy, although you could sew it on as well. Sewing is probably the way to go if this is intended for a small child; it is less likely to fall off through normal wear and tear, and would be less likely to fall apart in the washing machine. Although the hot glue does stick the layers of felt together very well.

Other ideas I had:
-Sports bears: Made in team colors, with a football/basketball/whatever on the tummy
-Superhero bears: Black for Batman, red/blue for Superman (or Spider-Man), green for Green Lantern, etc, with the corresponding bat/S logo/spider/green symbol, etc on the tummy
-Star Wars Bear: Jedi symbol on the tummy
-Star Wars Bear (Dark Side): Made in black, with the empire symbol on the tummy
-Star Trek Bear: Made in gold, blue, or red, with the Starfleet symbol
-Doctor Who Bear: Made in TARDIS blue...not sure what the tummy symbol should be, though. The logo? Which one? It would be pretty tricky to do in felt. Maybe a police box.

You get the idea. I still want to make a Pink Floyd bear, though.

Question for the comments: What would you most like to see?

Wednesday, December 1, 2010

Yarn: A Non-Snob's Guide (Part 1)

As I type this, the first snow of the winter is falling in Chicago. This means that, without a doubt, knitting season has begun. (Avid yarn crafters will point out that knitting season never really ends, but those who don't like to knit or crochet when it's 95 will agree that it's time to start up again.)

I was talking with a fellow knitter over the weekend and the conversation turned to elitism. We agreed that the presence of "yarn snobs" can make a knitting group less welcoming. Yes, knitters can be elitist. I have noticed that many of my knitting books were written by yarn snobs. It is not hard to tell from reading the "Guide To Fiber" section, or something similarly titled. What follows is a non-snob's guide to different yarn fibers.

Acrylic
Basic info: Acrylic yarn is synthetic, as opposed to coming from an animal or plant. It has a (somewhat unfounded) reputation for being cheap and uncomfortable for that reason, but technology has advanced enough that today's acrylic yarn can actually be quite nice. Lion Brand has two that I really like: Wool-Ease is 80% acrylic and 20% wool; Vanna's Choice is nice and soft and comes in a wide variety of colors.
Pros: Acrylic yarn is inexpensive and very easy to come by; most of the yarn at craft and fabric stores is either acrylic or an acrylic blend. It is also machine-washable.
Cons: The really cheap stuff can be scratchy. Before you buy a skein, pick it up and feel it. Try and get your fingers inside. If the yarn feels uncomfortable in the skein, it will not be fun to work with, and the finished product will not feel much better. Walking around with a big skein of acrylic yarn is also the easiest way to draw the wrath of yarn snobs.
I use it for: Afghans; craft projects like stuffed animals; Christmas stockings.

Wool
Basic info: Wool is the most common of the animal-based fibers (and Captain Obvious would like to remind you that it comes from sheep). There are two basic flavors of wool yarn. The original will shrink when washed in the washing machine, which is exactly what you want for a felting project but not so good for a sweater that you have been working on for two months. Superwash wool has been treated to prevent shrinking; if you have a felting project this is the kind you do NOT want.
Pros: After acrylic, wool is the easiest fiber to find. It is soft and warm and will keep you dry even when it gets wet. It is wonderful to work with. Price-wise, it is less expensive than the other animal fibers.
Cons: Just be careful when you buy it and when you wash it. If it says "Superwash" on the label, it can be washed in the washer (though you might want to do it with your delicates). If it does not, wash it by hand and let it air-dry unless you want it to shrink. Super-soft wools, like merino, tend to "pill" (those little tiny balls of yarn that appear after it has been worn for a while).
I use it for: Mittens and hats. Wool is the only thing I will use for mittens, because of its near-miraculous waterproofing abilities. Seriously, if you have kids who like to play in the snow, they need wool mittens. I only wish I had known that growing up. Superwash wool is also excellent for winter socks and sweaters.

Cotton
Basic info: Cotton is the most common of the plant-based fibers. It can be hard to dye, so it usually comes in lighter colors than wool or acrylic.
Pros: Cotton is also easy to come by. It is pretty soft, especially if you think wool is itchy. It will not pill or shed like acrylic or any of the animal fibers. It is usually machine-washable, although the colors will fade after a while. It is the least expensive of the plant fibers. If you are worried about how "green" your yarn is, organic cotton is easy to come by.
Cons: Cotton gets heavy when wet. It can also be difficult to work with, because it does not have any stretch. If you make a mistake and need to rip out a few rows, the yarn will be more kinked than wool or acrylic would be. It is not very warm.
I use it for: Dishcloths and dish towels (one application where wool would be disastrous; you'd end up with fiber all over your dishes). It is also good for lightweight tops or a knitted swimsuit (no, I'm not kidding. There are patterns for it).

This post is becoming much longer than I thought it would be, so I shall finish there for today. Stay tuned for more; next time we will get into more exotic (and expensive) fibers. For the non-crafters, stay tuned for a post coming soon about the Chicago TARDIS convention.

Monday, October 25, 2010

Crochet Project: Tetris Afghan

As I mentioned in my last post, most of my crafting comes from knitting and crocheting. I knit more often than crochet, but it's nice to be able to do both. I like crochet for smaller projects, and I love making granny squares. For those not in the know, you've probably seen projects made from granny squares without knowing what they're called. Here's a nice simple one:

(Source)

They're small, easy, and addictive. Even beginning crocheters can churn them out easily. There are whole books of granny square patterns--they can be plain, like that one, or have color changes and patterns in the middle--and are the building blocks for larger projects like pillows or blankets.

I was inspired by the simple beauty of the granny square to make some sort of picture...but what could you make with only squares? The answer came almost immediately: Tetris! I will admit that, when it comes to video games, I am usually pretty lost. Most of my video game knowledge is picked up by osmosis from my brother and/or my boyfriend, and my strategy usually consists of pushing random buttons and watching what happens. But Tetris is one game I actually enjoy. So I set out to design a Tetris afghan. After A LOT of design ideas, I finally came up with two that I really liked.


The one on the right could be an actual Tetris game...if you were really, really bad. It was easier to design one with black squares on every row than it was to design one with no black squares, but the neat thing about the one on the right is that there are exactly 20 squares of each color: 20 black squares and 5 of each Tetrimino shape. The one on the left is really more inspired by Tetris, because of course the shapes packed so closely together wouldn't be found in a real game. I turned the Tetris-game design into a real afghan for my brother's birthday last year.


The color scheme that I chose is from the iPod version of Tetris (SO addictive, aside from the finicky controls) except I realized, after the blanket was complete, that I'd mixed up the colors for the red and green pieces (the red ones are actually supposed to be green, and vice versa). Oh well.

It's 10 blocks wide and 16 blocks tall, which works out to 160 little granny squares. These are pretty small, and they work up quickly, but it was A LOT of work to assemble. I sewed the Tetriminoes together using the same color yarn as the block, and then I joined the different blocks and black squares together using black yarn and slip stitch. The slip stitch join is slightly raised, which gives it a bit of texture. I put a lot of work into the design, and I'm really pleased with how it came out.

You can use the granny square idea to assemble any kind of (small) picture...I think it works really well with 8-bit video game graphics. What next? My new favorite video game is Pac-Man...I swear those ghosts are ganging up on me!