Tuesday, January 29, 2013

Hat #5 (Hat-a-week): Pac-Hat!

I have decided, with January coming to an end, it will be much easier throughout the year to count the number of hats I've made instead of the number of days in 2013...

My fifth hat is inspired by an icon of 1980s arcade games, the one and only Pac-Man!


It looks like a big chunk is missing from the middle, but that's only because the mouth is black yarn and I took this picture on a dark purple background.

Here is the design from the front:


And from the other side:


Waka waka waka waka waka!

There is no chart for this one, but if you are interested, I started out with 6 stitches of black yarn and then added 3 black stitches on each side of the mouth, every 2 rows, until the mouth is 42 stitches across. The top of the mouth is worked the same way in reverse.

I may make a ghost hat at some point in the future...right now I don't think I have the right colors of yarn.

Also, for anyone interested, I am now on Pinterest! I haven't posted any of my hat designs yet, though. Right now I'm still learning the site. There is so much to navigate.

Monday, January 21, 2013

Hat-a-week, day 21

Ahh, a long weekend. The perfect chance to knock out another hat! The idea for this design came from a friend of my hubby's. Here is an in-progress shot:


Look familiar? If you recognize it, you must be a fan of pro wrestling. For the record, I am not, but Jason and his friends are. Big-time. 

The "nWo" design was created by stranding the white and black yarn together, a technique that is also referred to as Fair Isle. I'll explain more about that in another post. The two little rings you see in the picture above are stitch markers, which I used to make sure the design was in the right spot.

Here is the finished hat!


I added the white rectangle after the hat was finished, using the embroidery backstitch with white yarn. It came out a little crooked, but it actually kinda works that way. Here's a chart for any other knitters interested in making a wrestling hat:

Quick note on the design: even though the design itself is worked using Fair Isle, you'll still need to work it back and forth in rows. Fair Isle in the round only works if the design goes all the way around the circumference. I realized this about one round before I was going to start knitting the design. I was able to find a way to cheat and work it in the round using a technique from Debbie Stoller's Stitch 'n Bitch Superstar Knitting. The SnB books are some of my favorite knitting guides. I love the way Debbie Stoller explains things.

I already have my next hat in mind, featuring one of my favorite retro video game characters: Pac-Man! Stay tuned.

Saturday, January 19, 2013

Hat-a-week, day 19

My third hat is complete! Mario's actual hat is more of a baseball cap, but my brother requested a ski cap with the Mario "M," so that's what I made. I rather like it.


I sewed up the back and worked in the loose ends last night. I went with a fairly tight gauge--about 5 stitches per inch--so it would be extra-thick and warm.

What is gauge?
I'm glad you asked! The gauge of any knit or crocheted item can be measured by counted the number of stitches in one inch across. Seriously, you can calculate the gauge on that sweater you bought at the Gap. You probably have no need to, unless you want to make one just like it, but you could.

The type of gauge needed for a project depends on two things: thickness of the yarn and how loose or tight you want the finished item to be. This hat is made from worsted-weight yarn, which is the most versatile yarn weight. You can really use almost any needle size, depending on the look and feel you want for your project. For something you want to be very tight, like mittens, the needles will be very thin (size 2 or 3) and the resulting mitten will be sturdy enough to keep your hands warm in the coldest weather. Hats and sweaters are worked on medium-sized needles (size 6-8) for an item that is sturdy but still has enough stretch to fit over your head. Items like afghans can be worked on needles that are even larger (size 10-11), although those patterns will probably incorporate something like slipped stitches to keep the gauge from getting too loose.

For this hat, I used size 6 needles. This meant that I needed more stitches in each row, so the hat took a little longer to make. It also means that the logo in the middle is smaller than it would have been with a looser gauge. Incidentally, if you want to figure out how big a design will be, it is a simple matter of dividing the number of stitches in your design by the number of stitches per inch.

For example, my Mario design is 14 stitches across at the widest point. 14/5=almost 3 inches. Most hats are worked on slightly larger needles for the yarn I used (size 7 or 8) for a gauge of about 4 stitches per inch. 14/4=3.5 inches.

As your reward for slogging through all the knitter's lingo and math talk, here is a Styrofoam head wearing the Mario hat!


Yes, I just happened to have a Styrofoam head in my apartment. It belongs to my hubby, who got it with his Emperor Palpatine mask. Incidentally, those white streaks you see on the hat came from the baby powder that he puts on the mask to keep it from cracking. Whoops. Good thing my hat is washable.

Tuesday, January 15, 2013

Hat-a-week, day 15

I have not had much time for knitting, and even less time for blogging, so here is a quick update on my latest project. I spent Saturday afternoon sorting through my stash; after only two hats I realized I could make a hat every week for a decade and still have too much yarn. So I went through my various sources of yarn and filled a bag of remnants and yarn I know I'll never use (lightweight yarn for baby sweaters, anyone?) to donate. I found an unholy snarl of yarn at the bottom of the chest that I ended up just tossing, along with a couple half-started projects full of dropped stitches because I pulled out the needles to use on another project. The chest of yarn now looks like this:


Some of the yarns I sorted into bags, like wool for felting and red, orange, and yellow yarn that I want set aside for a hat I have in mind...stay tuned!

I also started work on my brother's birthday gift. He requested a ski cap with the Mario logo. I decided the easiest way to knit it onto a hat was to start with a picture of the logo and transfer it to knitter's graph paper (which is different from regular square graph paper, since knit stitches are wider than they are tall). Here's the  logo pattern:


The main yarn I'm using is KnitPicks Swish Worsted, which is a superwash merino wool. I had a couple balls left over from a sweater I made my mom a couple Christmases ago. The white is the Hobby Lobby brand acrylic, which is also nice and soft. I worked the white circle using the intarsia method, which can only be done by going back and forth, so this is another hat I'll need to sew up the back when I'm done. For those interested, the M in the middle was done with Fair Isle. It could also be done in duplicate stitch after the hat is finished.

And here are some progress shots of the hat! 


Close-up of the logo:


I have until early next month to finish it up, so this hat will definitely be done on time!


Sunday, January 6, 2013

Hat-A-Week, day 6

My second hat is complete!


It turns out the bottom wasn't that much wider than the top after all, and it still works as a ski cap. I'm pleased with how it came out.


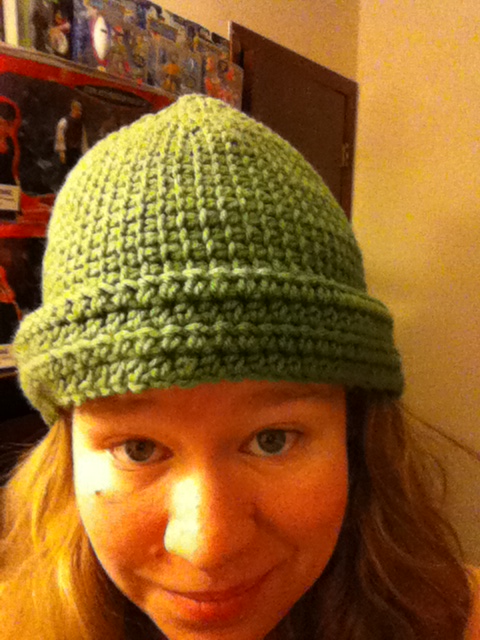
And here it is on my head!

In case you want to try making it yourself, here is the pattern.

You will need:
Worsted-weight yarn (1 skein)
Afghan crochet hook, size H
Regular crochet hook, size H (optional--the afghan crochet hook can also be used like a regular hook, although it is a little awkward)

With regular hook, chain 86. Yarn over and insert hook into 3rd chain from hook. Work the first row of half-double crochet (84 hdc). Chain 2, turn.

Work 3 more rows of hdc (about 2 inches). Switch to afghan hook.

To work the afghan stitch: *insert your hook into the first hdc and pull up a loop. Repeat across (84 loops). Yarn over and pull through the first loop. This is similar to a turning chain. Yarn over again and pull through next 2 loops. Repeat, pulling through 2 loops at a time, until there is only 1 loop left.* This counts as 1 row. Do not turn your work; afghan stitch is always worked on the right side of the fabric.

Next row: insert your hook into the second vertical bar from the end (circled in the photo below). Yarn over and pull up a loop. Repeat across (84 loops). Decrease the same way as above.

Just to clarify, if you are trying this at home and you think it looks backwards: lefties like me work the afghan stitch from left to right. Right-handers work it from right to left.

Work afghan stitch until hat is the length you want (mine has about 3 in of afghan stitch, but it could be longer).

Decrease: Always decrease on the row when you are picking up loops, and then work back to the beginning of the row.

Decrease row 1: *Pick up 5 stitches, insert hook through next 2 loops and pull up 1 stitch (decrease made), repeat from * across.

Decrease row 2 and all even-numbered rows: work across all stitches.

Decrease row 3: *Pick up 4 stitches, decrease, repeat from * across.

Decrease row 5: *Pick up 3 stitches, decrease, repeat from * across.

Decrease row 7: *Pick up 2 stitches, decrease, repeat from * across.

Decrease row 9: *Pick up 1 stitch, decrease, repeat from * across.

Decrease row 11: Decrease all stitches across.

Next row: slip stitch in all remaining stitches and finish off, leaving a long tail for sewing in. Weave the yarn needle through all stitches and pull tight to create the crown of the hat. Sew down the back. The seam on this hat will be pretty visible, so make sure you wear it with the seam in the back.

My next hat is going to be one that my brother requested as a birthday gift...so Johnny, if you don't want spoilers, stop reading the blog for a while. Of course, I'm not going to reveal what else you're getting for your birthday.

Saturday, January 5, 2013

Hat-a-Week, day 5

I am currently working on hat number two!

The yarn: Loops & Threads Impeccable (worsted weight, acrylic) in a sort of bottle green color.

The pattern: I am making it up as I go along! This is called an afghan crochet hook:

It looks like a combination between a regular crochet hook and a knitting needle, and the technique you use is sort of a combination of knitting and crochet. Regular crochet works by making several loops on your hook and working them until only one loop is left. This makes one stitch. With afghan crochet, you pick up a loop from every stitch in the previous row, and then work one stitch at a time (similar to knitting, except instead of transferring it to another needle, you pick up the same stitch on the next row). 

Here's an in-progress shot of the hat:

See how it's curling up at the end? Apparently that's a common problem with the afghan stitch. I didn't want the bottom of my hat to curl up after the hat was finished, so I added a few rows of regular crochet at the bottom, which lies flat.


See the difference? Also, you can tell from this shot that the stitches start to curl as soon as they come off the hook. Without the border the hat would probably curl up halfway to my forehead. Unfortunately, the half-double stitches are a lot wider than the afghan stitches, so this is probably going to be more like a bucket hat when it's all done. We shall see!


Here is a close-up of the afghan stitch. I like it because it kind of looks like a combination of crochet and weaving.

Wednesday, January 2, 2013

Hat-A-Week, Day 2


My first hat of the New Year is complete! It was nice to have a couple days off so I could work on it. I probably won't start on my next hat for a couple days. I need to decide on a pattern. Yes, even though I am calling this project "Hat-a-week," some hats are going to take less than a week. Some will probably take longer. It's all pretty flexible.

And now...the hat!

I am still experimenting with different photography and lighting techniques, using my ultra-sophisticated iPod Touch camera. Here I am wearing the hat. I stood right next to a lamp so the details would show:


Ta-da! I'm really pleased with how it came out. This is one of my favorite hat patterns; I have used it several times before. However, if I was making it for someone with a larger head, I would probably make it a little longer so that it covers the ears. On my tiny head it works fine.

Tuesday, January 1, 2013

Hat-A-Week: Day 1

I got a head start on my New Year's resolution yesterday and began my first hat for the 2013 Hat-A-Week challenge!

The yarn: I lost the label for this skein, so I don't know the brand. I do know it's black, worsted weight, and most likely acrylic. Unlike some knitters, I have nothing against acrylic yarn. I probably wouldn't use it for a sweater, but it works great for crafts and larger projects like afghans. I also like it for hats and scarves.

The pattern: Basic Cable from Stitch 'n Bitch Nation, designed by Christine Quirion. My hat is slightly different from the picture below. This version, by Ravelry user starshaped, was worked up using a self-striping yarn, which I also love, but I wanted something in solid black to wear with my black Sunday coat.

Hat made for my brother's girlfriend
via Flickr

The progress: The other change I made to the pattern was to work it back and forth, instead of in the round. For non-knitters, this means that when I am done knitting, the hat will be a long, mostly flat piece (except for the top) that I will sew down the back to create the finished hat. Knitting "in the round" means what you would think: the stitches connect to each other in a circle, forming a tube that you decrease at the top to create the top of the hat. Here is how the hat looks so far:


I'm glad the cables showed up in the photo.

I am using a circular needle, which is normally used for knitting in the round. Unfortunately, the cable (the part between the pointed ends) is too long for me to be able to work this hat in the round. I discovered, early on in my knitting adventures, that the length of the cable is just as important as the needle size. The cable needs to be slightly smaller than the circumference of the round project, or the stitches get too stretched out to join in a circle. For a hat, this usually means a 16" cable. This cable is 24 inches, which would be great if I were making a hat for Big Bird. However, circular needles can also be used for knitting back and forth.