Showing posts with label tutorial. Show all posts

Saturday, January 18, 2014

Super Secret Crochet Project Revealed!

I have been working, off and on, for several months on a large crochet project. You may have spotted some of the early attempts in the background of some of my advent calendar posts...but now it is finally finished! Ladies and gentlemen...Tom Servo!

"Actually, it's Serveaux."
He stands at nearly two feet tall, so we're talking life-sized here. He is made entirely from yarn and stuffing--a whole 12-ounce bag of stuffing, actually. There was no sign of a pattern anywhere online, so this is a combination of measurements I found on various bot-building websites, lots of pictures, and eyeballing it. I also have this four-inch Servo that came with one of the DVD sets, so I used him as a reference as well.


I started with the head and worked my way down. The head, neck, body, and "hoverskirt" are all one continuous piece, crocheted from top to bottom. The mouth is sewn on separately, and is actually three small pieces sewn together (top, bottom, and inside). The arms are one piece each.

I had some trouble with the detailing on his chest, which was originally the engine block from a toy car. I wanted it to be as simple as possible, without losing too much detail. The version I finally came up with has four separate pieces that are sewn together and then sewn onto the chest.


The tube around the bottom is just one long piece, and the other details on his skirt are also sewn on separately. They were originally pieces of plastic vacu-formed over the engine from a toy train set. There are six of them. I found the best way to space them out was to sew the front one on first. Then I placed the back one directly behind it. Then I placed two in between on one side, and repeated on the other side.

I also found some other great re-creations of Tom. Here he is, along with Crow T. Robot, in Lego form:

Via Reasonably Clever!
And this great plushie is made from felt and stuffing:

Via
Anyway, this was great fun to make! I took notes on all of the parts, which I am going to type up and have available as a pattern. Hopefully this will be within the next week or two.

Sunday, December 22, 2013

Advent Calendar, Day 22

Today's activity: Listen to Christmas music and wrap gifts.


We had quite a few things to wrap, because we're visiting my family on Christmas morning and Jason's family in the afternoon on Christmas day. 

There are a few tricks to wrapping gifts so they look neat. The first step is to measure how much paper you will need to fit around the box. Start by wrapping the whole roll over your gift, and cut it so it overlaps by an inch or two.


If you want to make sure you're cutting straight, it helps to have a wrapping paper with a checkerboard pattern, or one that has a grid on the underside. 

Measure the paper needed to fold down over the bottom. It should be about 2/3 of the height of the box, so the two ends overlap without causing too much bulk.


Once the gift is positioned, you can tape it along the long sides to form a tube. Next, fold in the corners along the bottom. Fold the top one down and the bottom one up. Tape them in place.


It is very hard to eyeball how much paper is needed to create the fold on top. If the ends are too short, there will be a gap in the package. If they are too long, the paper will get crumpled when you try to tape it. Here's how to get the perfect size every time. Stand the box up on its end. The extra paper will form a cone up into the air.


Now hold the paper right above the box and fold the cone outward. The edges of the paper will flatten outward:


Now cut straight across the top of the paper right after it flattens out.


Then fold in the ends on the top the same way as the bottom. Voila!

Of course, this only works if the package in question is a box. There is a secret to wrapping oddly-shaped packages, too:


Stick it in a gift bag. Done! Add some tissue paper to be fancy.

Jason and I wrapped our stocking stuffers for each other, most of which we bought at Dollar Tree. It turns out that strange minds think alike...


Yeah, we both picked out a set of cheapo plastic ninjas. Why did we get each other dollar-store Ninja Action Figures? Mostly because of this.


Ninja: The Mission Force was inspired by Godfrey Ho. His ninja movies seem to be written by a bunch of seven-year-olds who care more about making things look cool (without any budget) than little things like plot or continuity or sense. The "action" scenes are spliced together with footage from completely unrelated movies, to form one incoherent storyline. They are a wonder to behold.


Godfrey Ho Ho Ho says, "Merry Ninjamas!"

Wednesday, December 18, 2013

DIY Ugly Christmas Sweater

We're having an Ugly Sweater Party at work on Friday. I've never been given an "ugly sweater." If anyone in our family is knitting sweaters, it's me, and I try to choose designs the receiver will like. My aunt suggested shopping the secondhand stores for one, but it appears that people are buying them and then re-selling them for upwards of $30. I am completely baffled by this. I blame the hipsters and their "ironic" wearing of everything.

I did find a plain green sweater for $4 at Salvation Army, which I used as the backdrop for my own nerdy/ugly sweater. Behold!


Everything except the lights around the neck and Darth Vader's face was made from felt. It's a great material because there is no fraying, so it can be attached with hot glue or sewn on without having to hem it.


I cut the stars, snowmen, and gingerbread men by tracing around cookie cutters. 


The Santa hat was cut freehand, and Darth Vader's face was cut from an old T-shirt I bought to turn into a pillowcase. I left about an inch around the face to prevent fraying. 


I added a few more nerdy touches: the gingerbread men are wearing Starfleet shirts (in red, of course). I got the idea from a Foxtrot strip. The snowmen are dressed as the 4th and 11th Doctors. Here's an in-progress shot from before I attached all of the pieces.


I embroidered the snowman faces, but all of the other details are done with Sharpie markers. Both look great on the felt. All of the pieces are glued on except for Darth Vader's face, which I sewed on using blanket stitch. 

The finishing touch was my only purchase besides the sweater: a set of Christmas light beads that I found from Oriental Trading Company. They cost $15 including shipping, which is pretty steep, but I think it's worth it.


And one final shot of me in my sweater. The neck is a lot wider than I usually wear, which adds to the "ugly" effect and also shows off the Christmas lights rather nicely.


Happy Christmas, live long and prosper, and may the force be with you.

Saturday, December 14, 2013

Advent Calendar, Day 13

Today's activity: Shop for stocking stuffers!


I love to buy things for stockings. There's a real balancing act to it. If your things are too big (or there are just too many of them), they won't fit in the stocking. Too small or not enough items, and the stocking looks empty. To top it all off, everything needs to be relatively inexpensive. 

When I was in high school, my mom suggested that she and my dad would purchase and stuff the stockings for me and my brother, and we would do the same for them. With those years of experience, I have perfected the art of stuffing stockings.

Step 1: Know where to shop.

Pharmacies like Walgreens or CVS have a good selection of inexpensive stuff, but dollar stores are even better. We like to do a mix of things that are useful (toothbrush, batteries, small tool kit), things that are fun (candy, toys, nail polish), and things that are good for a laugh. The dollar store is excellent for finding stupid/funny stuff. One of my favorite people on YouTube is Ashens, who often reviews "tat" from the British equivalent of dollar stores: Poundland.


Secondhand stores are also a good place for inexpensive stuff. In the past we've all bought movies for each other from a place in my parents' neighborhood that sells VHS tapes for 50 cents.

Step 2: Know what to buy.

In addition to the different kinds of gifts, you'll need to buy things that are the right size. You'll need a few small things for the toe (or one medium size thing), one large or two medium things for the body, a few other small things to round it out, and a topper. The topper should be something visually appealing to leave unwrapped, sticking out of the top. Stuffed animals are an obvious choice, but you could also do a book, movie, or box of candy. 

Also, try to visualize the size of the stocking. Make sure your "large" gift is still small enough to fit inside. A rolled-up T-shirt makes a good gift to take up the body.

Step 3: Do a "test stuff."

Before you wrap the stocking stuffers, figure out how you're going to fit them all inside. Start with the toe and work your way up. If you find yourself with too many things left over, take everything out and try stuffing it a different way. This is why you stuff it while everything is unwrapped--if you put everything in and out three or four times, the paper on at least one item is sure to get ripped. Especially if your wrapping paper is also from the dollar store.

Speaking of wrapping paper, one year my family had a roll of stuff that was guaranteed not to rip. This is great for large and irregular shaped items, but DO NOT use it for stocking stuffers. My dad can speak from experience on that one. Mom had to spend about half an hour getting everything open.

Step 4: Wrap the items.

Make sure you remember how everything fit in during the test stuffing. If you're worried you'll forget, write a small "1" on the items that go in the toe and a "2" on the item/items that go in the body. The small things can fit in wherever there is room. To save time, some of the small things can go unwrapped.

Step 5: Stuff your stocking!

Saturday, October 19, 2013

Clockwork Droid, Part 4

Work on the costume has been slow, because I like to work on too many things at once. I'm also working on a Super Secret Crochet Project for someone whose birthday is the day after Halloween, so I took a break from my costume to get a big chunk of that done. I switched back to the costume when a friend at work invited us to a Halloween party next Friday. I have one week to get everything finished.

Here is where I am right now:


I've hemmed the ruffle on both sleeves, which is probably the hardest part. I hate hemming, because it seems like no real progress is being made. Also, I had to fold the fabric over twice to keep the raw edges from unraveling and showing through. To top it off, I'm sewing this entirely by hand. My craft room has too much other stuff to allow for a sewing machine, especially since I sew so rarely.

Anyway, the hemming is done (yay!). I've sewn the ruffle to one sleeve. Now I just need to sew the other ruffle on, sew up the side seams, and put the sleeves into the dress itself. I want to get as much done this weekend as possible.

After I finished the side panel and shoulder seams, I was able to try on the dress for fit. Drumroll, please...

Yay awkward selfie!


Fits pretty well, I'd say. Don't worry; I'll have Jason take the "after" picture rather than try to do it myself in the bathroom mirror.

ALSO: If you are looking for costume ideas you need to check out Take Back Halloween. It's the polar opposite of "sexy cop/nurse/Big Bird/whatever" that seems to be everywhere these days. The costumes on Take Back Halloween are all inspired by women from history and mythology. I have to admit I wasn't familiar with quite a few of the people mentioned, but they have a biography for each person to go along with her costume. And all of their costumes are no-sew! A few are DIY but most include links to buy the separate pieces.

This one is my favorite: Lasiren, the Haitian sea goddess.

Via
Gorgeous! And a fascinating back story, too.

Happy costuming, everybody! Now back to my sewing needle.

Saturday, October 5, 2013

Clockwork Droid, Part 3

The front panel is sewn in! But before I show you that, here is my mask tutorial. This was the first part of the costume I started working on, back in 2010. The costume was originally going to be for Chicago TARDIS, but then I realized it would need a lot more work than I would have time to complete.

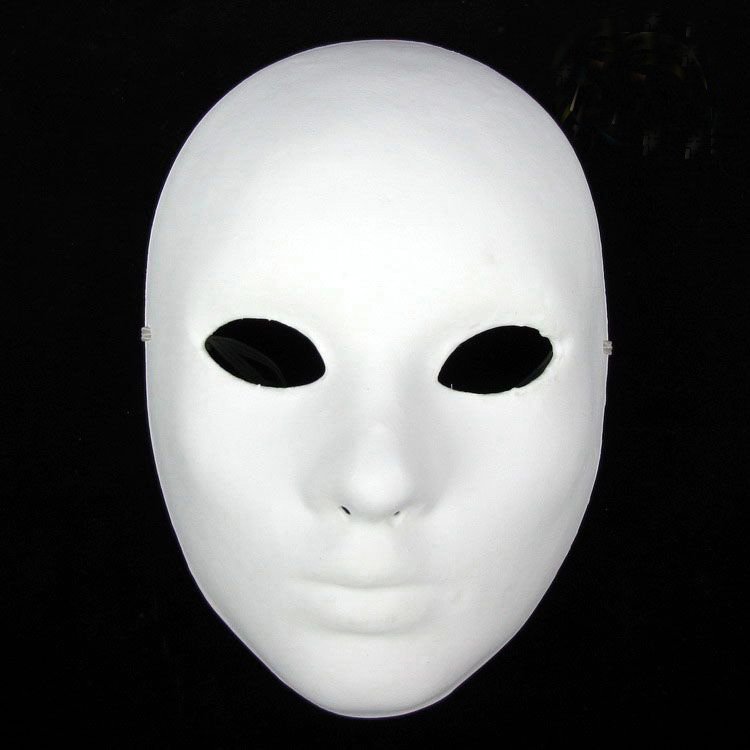
I started with a plain white mask from Michaels, similar to this one:

Via
You can't tell with the black background, but there was nothing covering the eye holes. I found a Halloween mask on clearance and cannibalized the eye hole fabric from that. I attached it with my trusty hot-glue gun. It looks opaque from the front, but I can still see through it just fine.


Then I went to work on the front. I sketched out the basic design in pencil first, then traced over it with Sharpie markers. I used a turquoise marker to match the dress, along with pink, black, and silver.


My initial thought was that silver coordinated more than gold would. I was going to leave it like that, but after my costume search I decided to try it with gold instead. I got a tube of gold puff paint to cover up the silver lines. As you can see, it was kind of tricky to get an even flow at first.


Still, I think it came out pretty well. I was looking at the mask this morning and realized that I had forgotten the line directly underneath the left eye, so I went back and added that in. I also did another thin line on the left to match the thicker line on the right and added a big glob above the nose to match the texture of the original mask from the show.


I may even go back and add more in the little spot above the nose, but first I need to see how it looks when the paint is fully dried.

Stay tuned--next time there will be pictures of the dress, including my first time trying it on after tearing it up.

Saturday, September 28, 2013

Clockwork Droid, Part 2

The costume is coming along quite nicely. I went back to the fabric store today to get the rest of my supplies, and now I can picture how the dress is going to look when everything is finished!

I sewed in the new front panel, but only on the bottom. I had to leave the sides undone so I could embellish the front. As I mentioned in the last post, I sewed the new fabric onto the edge of the existing fabric and then cut the old fabric away. You can tell from looking at the inside of the dress, but it's not noticeable at all from the outside.


I used the same fabric for the bottom of the sleeves...and then I was out of fabric. I also had no embellishments for the front. I tried playing around with the leftover lace, but as you can tell the results were not promising.


Not quite what I was looking for. So today I headed back to the fabric store to buy something for the sleeves and ribbon for the front. I brought a sample of the original fabric to try and match the color as much as possible.

None of the solids matched, but I did find a pattern that had a darker turquoise on a background that was darn near exactly the same color. Then I found a nice wide ribbon in the darker turquoise to tie everything together.

After playing around with different ways to attach the ribbon, I settled on gathering it just in the middle, with four lengths of ribbon across the front.


Next I added in the fabric for the sleeves, to see how everything looks together.


Right now it's all just laid out on the floor. Next comes sewing it all together! 

Of course, no clockwork droid costume would be complete without the mask. I'll do a quick post on that as well, so stay tuned.


Tuesday, September 24, 2013

Clockwork Droid, Part 1

As promised, here are some progress shots on my clockwork droid costume! We shall begin with the "before" picture: me in my $10 secondhand bridesmaid's dress.

I'm so glad I never had to wear this in public.
The tag says it was originally from JCPenney, but I found it at Goodwill. There are three main problems I had with it: the sleeves, the neckline, and the middle panel in the front (which includes the solid fabric under the lace). The sleeves are too puffy, obviously. I decided to replace the front panel with white fabric and a square neckline.

The first step was to take out the fabric I didn't want. I used a seam ripper to remove the stitches without cutting the fabric. I removed the sleeves first and then deconstructed the front of the dress:


I used a square-neck sweater to figure out how deep I wanted the new neckline to be, then I traced around the rest of the panel to create a pattern on tissue paper.

Yes, that's Christmas polka dot tissue paper. WHAT.

My initial thought was to sew the solid white fabric under the lace, so I started by cutting the lace. I also considered leaving the turquoise fabric in place, but ultimately decided it would be too distracting. You can tell from the second photo that everything is still attached to the skirt. There's no way to remove it without also undoing the gathers on the skirt, so I think I'm going to sew the white fabric onto the turquoise and then cut the turquoise off.


Here's the cut fabric for the replacement panel. I sewed around the neckline and turned it inside-out. I had to press it to make it lie flat, which I had never done before. My previous sewing experience is about equal parts repairs and doll clothes, with only a couple larger projects here and there. I kept the iron on its lowest setting because I was afraid of scorching the fabric. I probably could have turned it up a bit, though. The edges of the fabric were fraying like crazy, so I whip-stitched loosely around the very edge to try and curb it. It's an inherent problem with the fabric--the edges of the skirt are fraying too.

Before I sew it into the dress I'm going to embellish it with a ribbon or bows. I'll need to visit the fabric store for the ribbon and play around with it for a bit before I decide on the final design. I'm probably going to need more fabric for the sleeves, too. I bought an actual pattern to use for the sleeves (lower right). If I'm ever feeling really ambitious I may try making the whole dress, although that won't be for this Halloween.


Saturday, February 16, 2013

My iPod is bigger on the inside

A couple weeks ago I decorated an iPod case for my brother as a birthday present, and mentioned that I had an idea for another custom case. I had some time off this week and was finally able to get it done. Introducing...the TARDIS iPod!


Sorry for the flash..I'm used to using the iPod camera to take pictures for the blog, but I had to dig out my old digital camera to get a picture of the pod inside the case. Here's the best part:


Matching background screen!

And a shot of the back (before I assembled the case):


Here's how I did it. The first step was drawing the outlines and the words. I printed out a picture of the TARDIS the same size as the case and taped the case right on top. Actually, it was the same width but taller. That's why the bottom panels cut off in the middle. I also flipped the picture to create a mirror image before I printed it out, because I did all the painting on the inside of the case. This keeps it from rubbing off after use. I used the same paint markers that I had for Johnny's case: black for the outlines and a thin white marker for the words.


On the front, I lined it up so the hole in the center covers up "Public Call" and the on the side covers up the "O" in BOX. On the back, I lined it up so the hole for the camera covers up the first 3 letters. Now it says "ICE BOX" which I find amusing. Rather than try to trace over the letters in "Public Call" I just made small lines. The white you see in the windows and on the sign is actually on the picture I taped the case onto. A more confident artist could probably freehand the whole thing, but I like tracing. The markers are very easy to use and the lines are nice and even.

In my first attempt on the front, I colored over the words with the black marker. Either the words needed another coat or the paint wasn't fully dry, because the words were barely legible afterwards. I had to muddle over the problem for a bit until a solution came to me: if the paint markers are acrylic, and nail polish is also acrylic, will nail polish remover work to take off the paint? Answer: yes, it will. Rather than risk smearing the paint a second time, I drew lines above and below the words and left the space around them blank.

To make the sign, I cut out the sign from the picture I had printed (not mirror-image, so I had to re-print it) and pasted it in. I used a mixture of Elmer's glue and water. The only problem is that the printer ink is water-soluble, so the edges of the sign are now illegible. I was kind of going for a stained-glass feel, so it kind of works. That particular bit just looks more aged than the rest.

To fill in the background, I used tissue paper. I could have used solid blue, but all I had was plain white. However, I also have a set of 50 colored pencils! I colored in a block of blue using a few different shades mixed together. First I cut out small squares of white to fill in the windows, and a thin strip of black for the top:


I ended up doing three layers of white squares. The background covers the entire case, so there's blue behind the white. I didn't bother cutting around the windows; three layers gives enough opacity that you can't tell that there's anything behind it. Likewise, two layers of blue was enough to create the effect I wanted. 


For the front, I did thin strips to cover each side, again with a layer of black over the words before the two layers of blue.


I let everything dry overnight, then went back and trimmed away the extra paper with an X-acto knife. Don't try any trimming while the glue is wet--the paper is so thin it will almost certainly tear. I even had a couple rips while I was applying the paper, although that can easily be repaired by gluing a small piece on top to cover the hole. After the trimming was done, I put another glue-and-water coat around the edges and corners so they wouldn't pull away.


The first time I tried putting the two halves together, the bottom corners wouldn't fit, so I had to go back and trim a liiiiitle bit more paper from each side. The only problem with this particular case is that the tabs lock so securely I'm always afraid something is going to snap when I take them apart again. Now that everything is done it's going to stay together for a long while.

The finishing touch was my background picture. I traced over the windows and door panels onto another piece of tissue paper, colored it in, and scanned it into my computer. From there, I played around with it a bit in MS Paint (yes, I'm old-school like that) to darken the colors and add in the "Pull to open" sign. Then I transferred it to my iPod and set it as the background screen!